Alphabet- S

1. Saddle Stitch: When a book is bound, it is fastened in multiple ways. One of the processes involve the stitching of the back edge of the book either with thread or steel wires. Fastening the back edge fold of the book (Spine) with steel wire through the machine is called saddle stitch. The book edges will be fastened with not less than two wire stitch and if needed more no of stitching will be made depending on the size and strength of the book.
Some times the saddle stitching is also done manually using cotton thread. That depends upon the thickness of the book. Therefore wire stitching the back edge fold of the book (Spine) to keep all the pages in position is called Saddle stitching. If the book has less no of pages, then it may be saddle stitched. If it has multiple sections (section means, sheets of more than four or more totaling to either 8 pages or 16 pages ) then each section stacked with other sections in correct order and will be stitched with thread and interlinked. This is done by hand. This process is called sewing the book. Automatic saddle stitching machines are also available for binding large scale books.

2. Score: Scoring is a process by which the cover sheets or boards to be accurately folded in a particular place is slightly creased to cause a dent in a straight line. A slight crease is made in a thick cover sheet of paper or board etc to facilitate easier folding without causing crack. Scoring is not meant to trim the sheet or the board, but only to allow easily folding without cracking. Scoring is also called compressing the thick paper or board along a straight line. The scoring is an important operation in box making –like shipping cartons, industrial product cartons, Pharmaceutical cartons and in binding for creasing the case cover boards to attach with the book etc. For example to make standard size of boxes, scoring dies containing the crease rulers are used and they are made in the market with appropriate position along with the box trimming dies which will cut the full boards to correct box size before they are creased. The creasing is also done by machines. If the volume of work is more, or a regular contract jobs, automatic machines are used.

3. Signature Marks : A Signature Mark refers to as a letter or other character or combination of both will appear on the first page of each section of a book. Since each book of several pages will have several sections, it is to be ensured that the pages and sections are placed in the correct sequence order before binding. Therefore to help the binders gather the sections of the book in correct sequence, an identification mark that tells the sequence like 1,2, 3, 4 or A, B, C, D etc are printed as Signature mark, but at the same time the printed marks should not be visible after the books are bound, lest it will mar the appearance of the book and therefore they are printed in such a manner that the Signature mark remain either in visible after the book is bound, or they get trimmed off from the extra margin where they have been printed.
A printed book whose volume is more and running to several pages will be printed as several sections, each section containing several pages. Note that each section will have uniform no of pages in each of the section. Each sheet will be bigger in size and printed with multiple ups of pages. When bunch of pages are folded and made to 8 or 16 pages, they will be called one section. Sometimes a section may also have more no of pages. The sections will be in multiples of four only when each sheet is printed with four ups, and multiples of two when two pages per sheet is printed and so on. If 8 ups is printed, the section will have pages in multiples of 8 pages only.
When the entire pages are printed, they will be folded in to book size and made ready for further operation of gathering the pages from page no one to X no of pages before binding the books. In order to ensure that the pages are gathered in the correct sequence, the processing made faster and confusion free compilation is ensured, each sheet which will form the top sheet of each section will be printed with an identifiable sequential mark called Signature Marks that will be visible on first sheet of each section.

4. Self seal Cover: Generally the envelopes used to have gum on the envelop flap to seal (Close) the envelopes after placing the document inside. The gummed area (which remains dry) will have to be slightly damped to activate the gum and then the cover sealed by closing the flaps. Instead of gummed flaps, the business and invitation envelopes are produced with peel and seal, or rub and seal techniques.
In the case of Pick and seal process, the pre-adhesive coated gum area will be covered with non sticking thin silicon paper which will have to be peeled off before closing the flap and pressing it to close the envelope. This is similar to the labels which are pre-gummed and comes with protective thin silicon paper. Once the paper is removed the sticky adhesive will quickly stick to any surface against which it is contacted. In the case of envelopes the flap containing the adhesive contacts the envelop body to close the opened area. Many of the envelopes are coated with mild heat sealing adhesives which allow them get sealed when slightly rubbed due to mild heat generated. All these pre-gummed envelopes which can get sealed without physically dampening them with water are called Self Seal covers.
5. Spine: The bound edge of a book i.e the area where the folding has occurred is called the spine.
6. Split Fountain : Like Rainbow or Prismatic printing, more than one color ink is put in the same ink fountain to print different areas of the print with different colors, however ensuring that the ink do not get mixed even in the supply line to the plate. Such an ink fountain is called the Split fountain. The colors will be put in the same fountain side by side by separating them with a separator. The operation of the Vibrator roller will be cut off to ensure that the inks do not get mixed with each other.

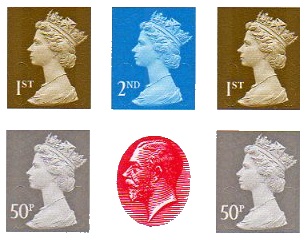
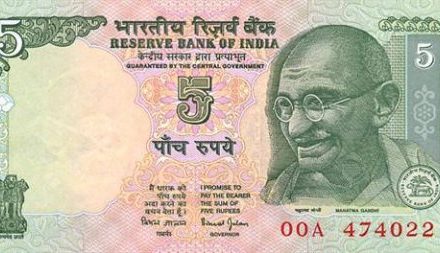
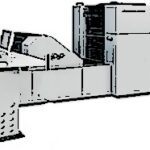
7. Step and repeat: The process of creating or producing on a photographic film, several ups of the same image all positioned at pre-laid out fashion against a layout is called step and repeat. When small Labels, Stamps, Currencies and similar jobs are printed, they will be printed in multiple ups on bigger size of sheets and then cut to separate them. This process will reduce the cost of printing as well save considerable amount of time. The process of repeating the same image either on the plate or on the negative or on the positive for further processing for printing in the above manner is called Step and Repeat process. This is called Step and Repeat because the same image is repeated on the same substance several times and exposed or processed. Several types of step and repeat machines are available in the market to accurately do the job of step and repeat. Prior to step and repeat operation, the job to be processed as multiple ups were accurately assembled on a layout sheet.
For example if a label of 3’’ x 4’’ size with 1/4th inch margin on all sides label is to be printed as 16 ups Label, the step and repeat machine will be pre-programmed to commence the first exposure at an X position- say 1’’ from the side- and then at the 1’’ position it is exposed , then moved to 3’’+ ½’’ = 3 ½’’ position, exposed again, then again moved by 3’’+ ½’’ = 3 ½’’ till it reaches the last Label point in the said row- say 4th label- where it is exposed.
Now the head carrying the negative on the Step and Repeat machine will come back to the fist label position of the first row. At that point, the machine will not cause the exposure, and instead it will move down by 4’’+ ½’’ to enter into the second row and start the exposure as stated for Row No 1. Again it will start moving by 3’’+ ½’’ = 3 ½’’ ( not 4’’+ ½’’ ) till it reaches the last Label point in the said row.
In each row the machine will move only as 3’’+ ½’’ = 3 ½’’ and when each row is completed, to enter to the next row the machine will move 4’’+ ½’’ down side as the Label size is 3’’ wide and 4’’ long. Why move additional ½’’ in every step? To cover the margin of 1/4th inch on each side. To understand the sequence see the illustration shown below.
When multiple ups negatives or positives are to be prepared they are to be done only by machine to ensure accuracy on multi color printing. However it is a single color job, the multiple up negatives or positives could be manually prepared by the Layout artist by stripping and pasting method, which involves making several negatives and positives, and then pasting the same on a well laid out Astralon or transparent base film using cello tapes. The non image areas will be masked suitably.
In the case of plate making, where manually multiple up images are created, first the layout sheet will be kept on the coated or uncoated plate and then the marks are traced on to the plate. The negative or positive with register marks will be positioned on those marks and exposed after masking the non image and other areas. The process of exposing through the negative in four areas (see illustration) of the plate as per the layout position will continue , every time masking the other areas. Then the plate is developed and processed for printing. If the ups are more than four this method is not preferred. To understand all these exercises see the illustration below.




Recent Comments